How To : Install Windows 7/Vista From USB Drive (Detailed 100% Working Guide)
How To : Install Windows 7/Vista From USB Drive (Detailed 100% Working Guide)
This guide works 100% for Vista & Windows 7 unlike most of the guides out there. I have seen many sites/blogs that have “Install Vista from USB guide” but either with incomplete steps or not working guide. I have also seen some guides that don’t’ use proper commands in this guide. After spending many hours I have come up with this 100% working guide.

I just did this method on one of my friends machine and installed the new Windows 7 BETA. The main advantage is that by using USB drive you will be able to install Windows 7/Vista in just 15 minutes. You can also use this bootable USB drive on friend’s computer who doesn’t have a DVD optical drive.
The method is very simple and you can use without any hassles. Needless to say that your motherboard should support USB Boot feature to make use of the bootable USB drive.
Requirements:
*USB Flash Drive (Minimum 4GB)
*Windows 7 or Vista installation files.
Follow the below steps to create bootable Windows 7/Vista USB drive using which you can install Windows 7/Vista easily.
1. Plug-in your USB flash drive to USB port and move all the contents from USB drive to a safe location on your system.
2. Open Command Prompt with admin rights. Use any of the below methods to open Command Prompt with admin rights.
*Type cmd in Start menu search box and hit Ctrl+ Shift+ Enter.
Or
*Go to Start menu > All programs > Accessories, right click on Command Prompt and select Run as administrator.
3. You need to know about the USB drive a little bit. Type in the following commands in the command prompt:
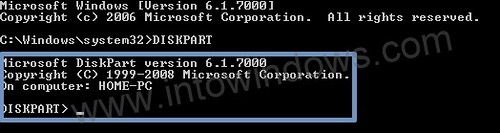
First type DISKPART and hit enter to see the below message.
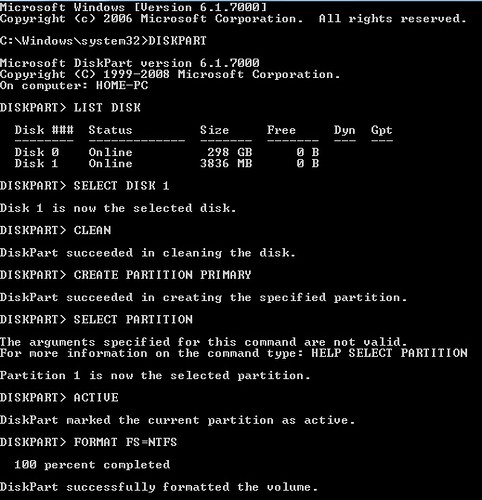
Next type LIST DISK command and note down the Disk number (ex: Disk 1) of your USB flash drive. In the below screenshot my Flash Drive Disk no is Disk 1.
4. Next type all the below commands one by one. Here I assume that your disk drive no is “Disk 1”.If you have Disk 2 as your USB flash drive then use Disk 2.Refer the above step to confirm it.
So below are the commands you need to type and execute one by one:
SELECT DISK 1
CLEAN
CREATE PARTITION PRIMARY
SELECT PARTITION 1
ACTIVE
FORMAT FS=NTFS
(Format process may take few seconds)
ASSIGN
EXIT
Don’t close the command prompt as we need to execute one more command at the next step. Just minimize it.
5. Next insert your Windows7/Vista DVD into the optical drive and check the drive letter of the DVD drive. In this guide I will assume that your DVD drive letter is “D” and USB drive letter is “H” (open my computer to know about it).
6. Maximize the minimized Command Prompt in the 4th step.Type the following command now:
D: CD BOOT and hit enter.Where “D” is your DVD drive letter.
CD BOOT and hit enter to see the below message.
7. Type another command given below to update the USB drive with BOOTMGR compatible code.
BOOTSECT.EXE /NT60 H:
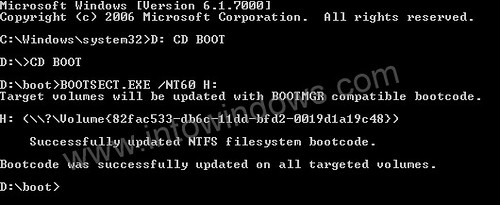
Where “H” is your USB drive letter. Once you enter the above command you will see the below message.
8. Copy your Windows 7/Vista DVD contents to the USB flash drive.
9. Your USB drive is ready to boot and install Windows 7/Vista. Only thing you need to change the boot priority at the BIOS to USB from the HDD or CD ROM drive. I won’t explain it as it’s just the matter the changing the boot priority or enabling the USB boot option in the BIOS.
Note: If you are not able to boot after following this guide means you haven’t set the BIOS priority to USB. If you got any problem in following this guide feel free to ask questions by leaving comment.
Update: If you find this guide difficult to follow, please use the easy-to-use guide to create a bootable USB to install Windows 7 using official tool.
How To Create Bootable Windows 7 USB To Install Windows 7 From USB Flash Drive (Using Windows 7 DVD/USB Tool)
As we reported earlier, Microsoft released a free tool called Windows 7 USB/DVD Download Tool to help you install Windows 7 on all netbooks in simple steps.

Although you can refer our how to install Windows 7 from USB guide to do the same, this tool simplifies the job. Here are the five simple steps that you need to follow to create a bootable USB flash drive to install Windows 7 from USB device:
Note: You need a USB flash drive with a minimum of 4 GB of free space. And also please backup your data from USB first.
1. Download Windows 7 USB/DVD Tool and install it.
2. Run the program, browse to your Windows 7 ISO image using the Browse button.

3. In this step, you need to select your media type. As we are here to create a bootable USB, simply click on USB device button.

4. Select your USB flash drive from the drop down box and click on Begin copyingbutton.

5. The Windows 7 USB/DVD tool will take a few minutes to complete the procedure.

6. You are done. Reboot you machine and start installing Windows 7 (Windows 7 installation procedure).
Windows 7 installation
While most of the Windows users are familiar with the Windows installation, there is one part of the user who really doesn’t know how to install Windows Vista/7 on their system as they have been using preloaded Windows on their PCs.
So I thought of writing a simple guide to cover Windows 7 installation procedure. Before we get into the innards of the installation you need to read below articles to make yourself familiar with Windows 7.
Here, I assume that you have bootable Windows 7 DVD or USB and you have already kept a partition (Minimum 16GB) to install Windows 7. I assume that you have made necessary changes to the BIOS so that you can boot from DVD/USB.
1. Boot your PC using Windows 7 DVD/USB drive and press any key if you see “Press any key to continue message”
2. Next select your language, keyboard type (Generally US) and time format.
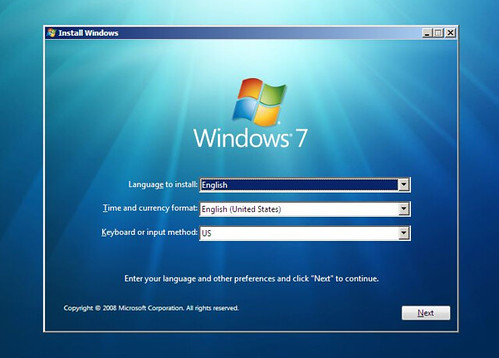
3. Click Install button.

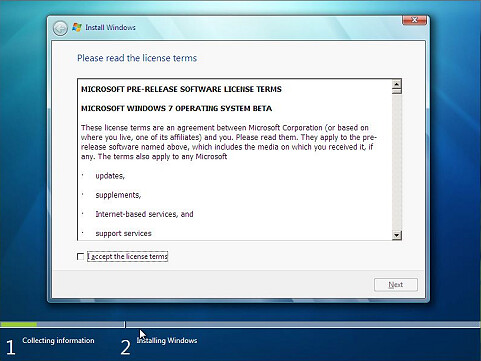
4. Click the box labeled “I agree with the license terms” and click Next to proceed further.
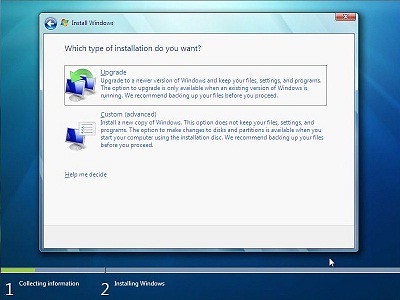
5. In the next screen click on Custom (advanced) option. I hope you are not upgrading here. If you are doing an upgrade then just click on the Upgrade option.
6. This is the important step as you need to select the drive which you have already prepared for the Windows 7 installation. Note that selecting a wrong partition will wipe out the data. Also note that Windows 7 creates another small partition of 200 MB if you are installing Windows 7 on an empty hard drive. Don’t worry as the 200MB partition will not be shown in explorer.
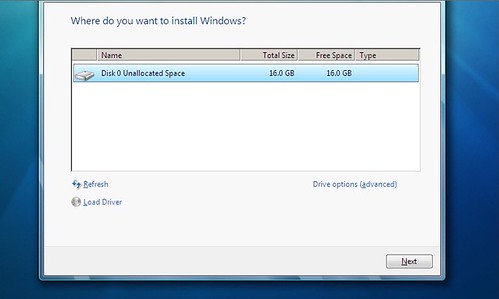
7. You can also format the selected partition by opening drive option and then choosing Format option.
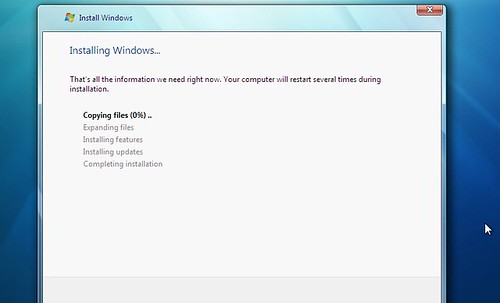
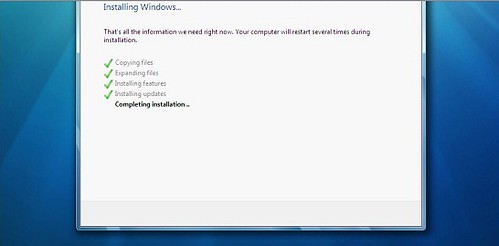
8. Click on Next button to start Windows 7 installation. Windows may restart many times during the installation and you need not to worry about that.
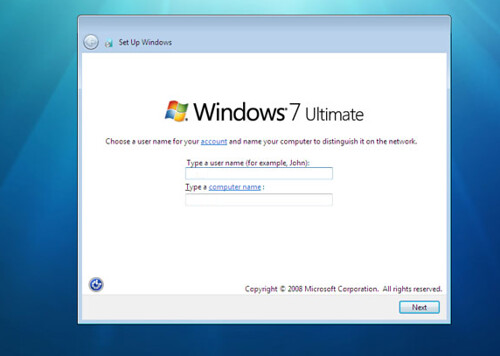
9. After completing the installation Windows will give you the below screen to enter your username and password.
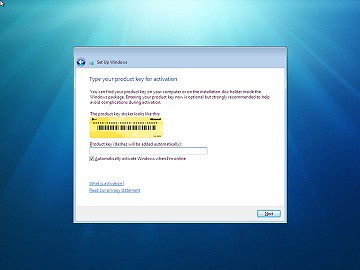
10. In the next step you will be asked to enter the Product Key. Enter the key that you have got and click Next button.
11. Here you need to select the Windows 7 update option. Click “Use recommended settings”.
12. Select Time Zone, date and time and click Next.
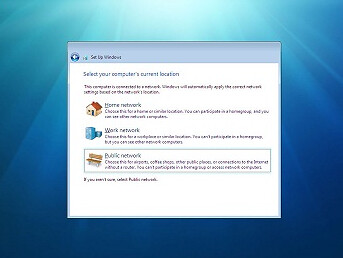
13. In the next screen, you need to select the type of network. That is, choose between Home network, Work network and Public network.
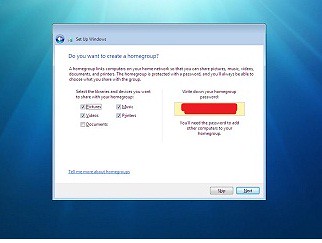
14. Finally Windows will ask you to create a group depending on the type of Network you have chosen. If you are not sure, just skip as you can do it later as well.
15. You will see Windows 7 desktop. That is, you have successfully installed Windows 7 on your PC.
16.Don’t forget to read “10 things to do soon after installing Windows 7” to make your Windows 7 secure.
17. Well Done..Good luck!
Disediakan Oleh :
En. Huzaini Bin Hashim
Unit ICT PKA


Recent Comments